Chapter 7 Audacity
This chapter will introduce you to editing audio in Audacity. Audacity is a free, open-source application. While it’s extremely powerful given its $0 price point, Audacity is not particularly user-friendly. Audacity’s manual is linked above. This chapter condenses that manual down to the bare essentials and highlights some information that Audacity’s manual buries. For instance, the note below is EXTREMELY IMPORTANT:7.1 Before beginning
Before completing the task below, download Audacity and LAME (if you haven’t already).
7.2 Troubleshooting
If this task is difficult for you, watch the first three videos in the Using Audacity Youtube playlist at home, then try again.
7.3 Getting started

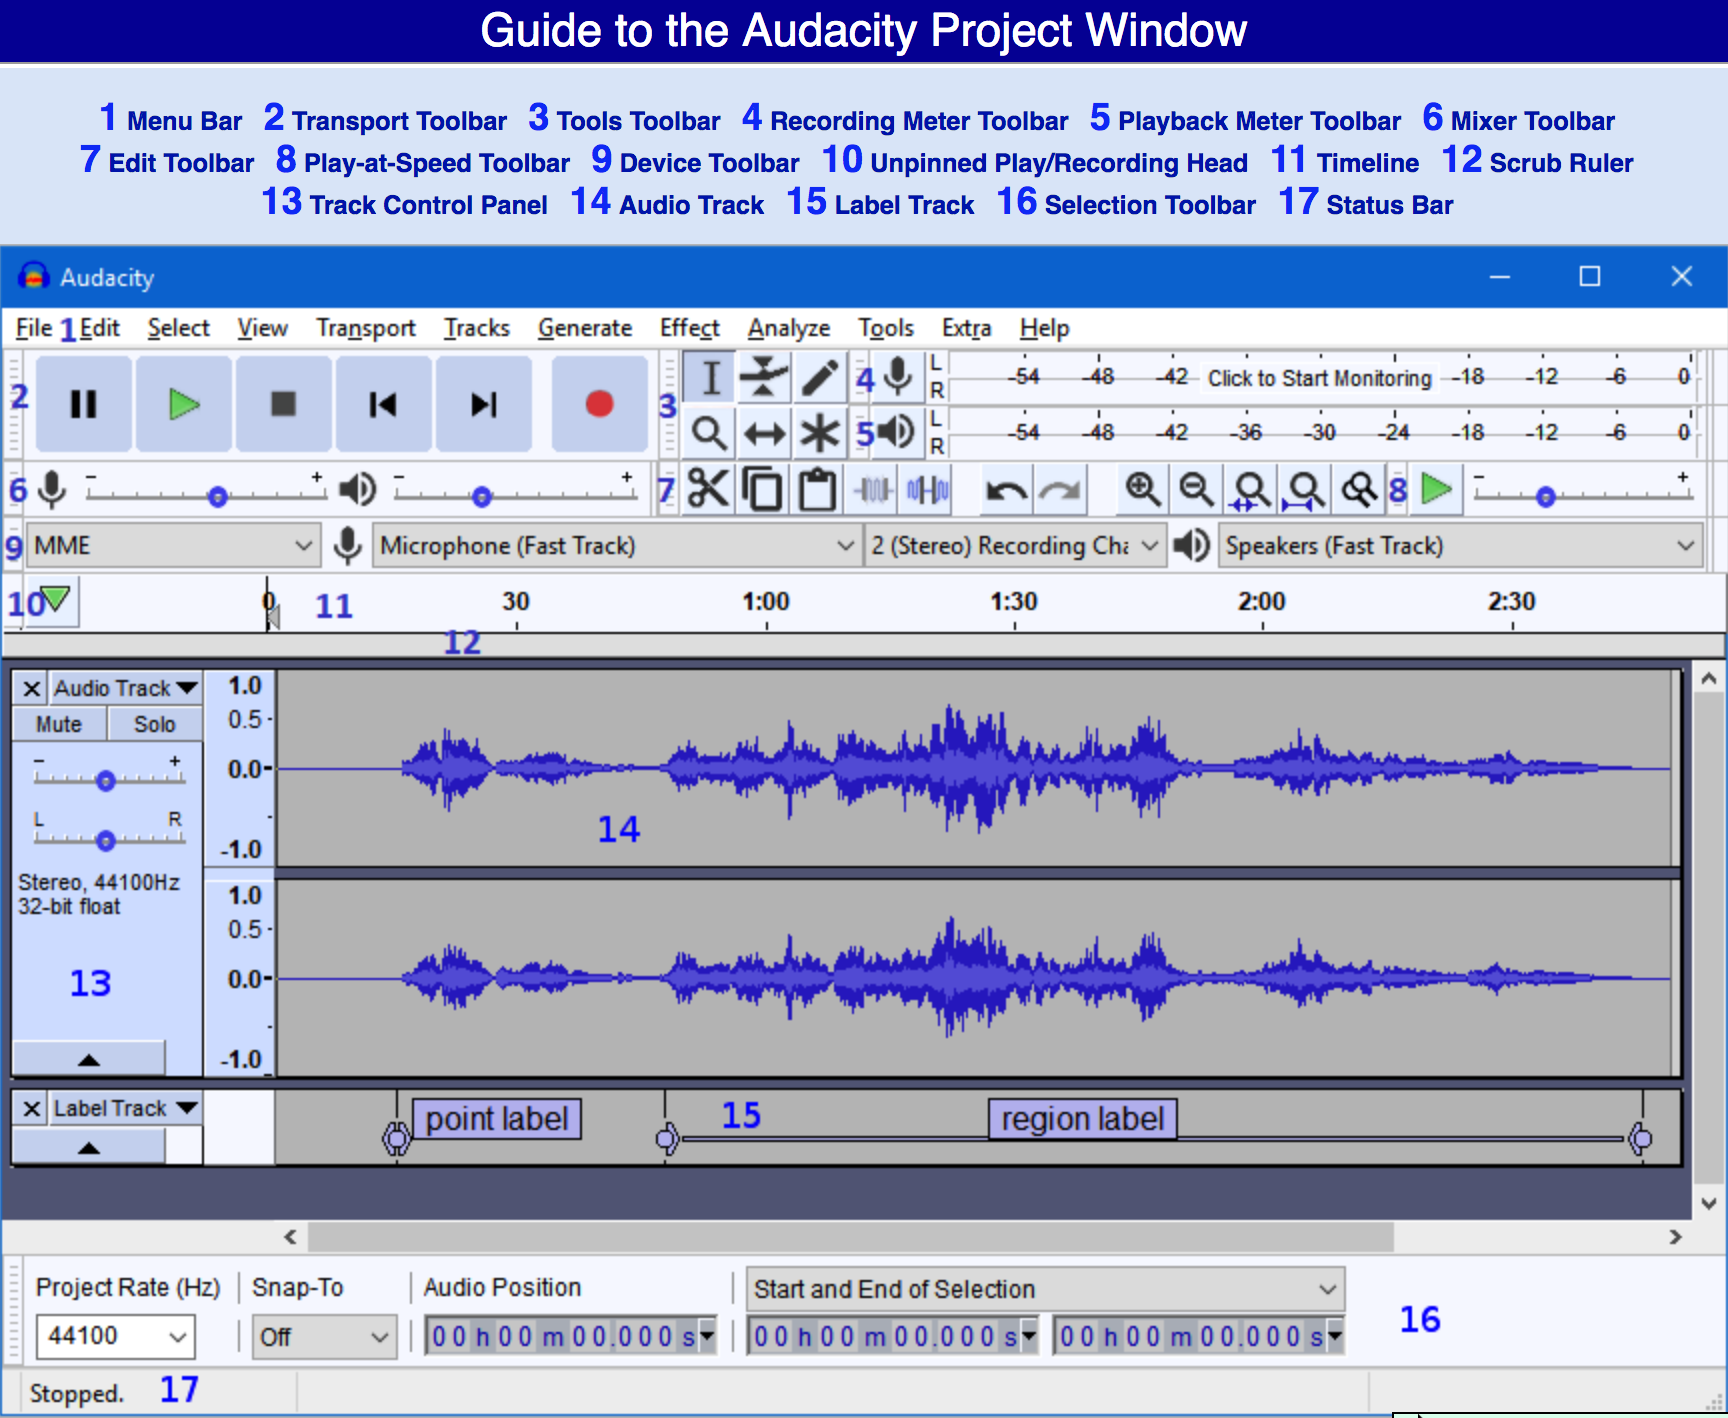
Audacity interface
First, we’ll learn how to copy, paste, and arrange audio.
- Download the “5 Things to Know” podcast.
- Open the mp3 file in Audacity and also open a new, blank project. You can do both from Audacity’s File menu.
If you can’t open the mp3 file, you probably haven’t installed the LAME encoder. (Confusing, I know.) See the Get started with audio assignment.
- In the Audacity interface, select about 10 seconds of audio. Split that selection from the rest of the track (
ctrl/cmd+ior Edit => Clip Boundaries => Split). - Copy that chunk of audio to your clipboard (
ctrl/cmd+c). - Switch to your blank file. Create a new track (Tracks => Add New => Stereo Track). Paste your chunk of audio into this track (
ctrl/cmd+v). - Select another chunk of the podcast track, split it, copy it, and paste it into another new track in your second project.
- Arrange these two tracks so that the second clip begins just as the first ends.
You now know how to perform basic audio editing in Audacity!
7.4 Adding effects and labels
Once you feel comfortable arranging audio clips, add some effects to your audio.
- Repeat steps 6-7 above, adding a third clip after the first two. This time, however, try adding a fade out. Align the third chunk of audio a little under the second, so that the clips overlap. Then highlight the overlapping portion of the second track and choose Effect => Fade Out.
- Add a fourth clip under the third, but try adding a crossfade instead of a fade out. Overlap the third and fourth chunks of audio, select the overlapping portion of both the third and fourth tracks, and choose Effect => Crossfade Tracks.
- Try autoducking. Autoducking can automatically adjust background sound whenever forground sound appears. This time, try using the Audacity user documentation. (You’ll probably need it later!)
- Add labels to quickly jump to each break. Place the cursor where your want to add a label and select Tracks => Add Label at Selection (or type
ctrl/cmd+b). Type a description for the label. Adding labels will save you from having to search for important points in your project. - Name each track. To the left of each track, look for the down arrow next to the phrase “Audio Track.” Click that down arrow and select “Name.” Change the name to whatever you want.
- OPTIONAL: Keep experimenting until you feel comfortable manipulating tracks in Audacity. Maybe try adding some audio from YouTube Creator Studio.
- Save the project and export it as an mp3 (File => Export Audio). Be sure to add metadata like track name, artist name, etc.
7.5 Free music and sound effects
We’ve discussed fair use and images. The same fair use guidelines apply to music. Thus, when possible, you should compose your own music or use Creative Commons-licensed audio. I’ve included some freely available audio below. In most cases, you should acknowledge the creator when possible.
7.5.1 Music
SoundCloud users have created hours of Creative Commons-licensed music to edit and use in your own work. Much of this music could be described as “amateur EDM,” but with a little digging you can find some great stuff. For example, check out this mix by Dublab, a non-profit radio network in Los Angeles. The mix features acclaimed artists like Julia Holter and James Pants.
As a music snob, I’d say SoundCloud has the best selection of good Creative Commons-licensed music, but the good stuff can be difficult to find. CCMixter, on the other hand, has compiled a playlist specifically for podcast creators.
7.5.2 Sound effects
A few well-placed sound effects can enrich the listening experience. The sound of rain, for instance, or of gravel crunching under footsteps, can immerse listeners in a story.
You can record your own sound, of course, but the YouTube Creator Studio offers plenty of high-quality sound effects (and music).